
Setting up a portal user
This guide helps you understand what a customer portal is and how you can set up an account for your customers.
What is a customer portal?
A customer portal is a website designed to improve customer relations. In the case of 24Flow, it's an automated way of communicating the status of orders to customers. It provides real-time information to customers with zero effort. This way, customers don’t call asking for updates, and your company can control what the customer sees. Once your customer portal is published on the internet, users with an account can log in. The only remaining step is creating a user account for your customer, which is explained in a few easy steps below.
How to set up portal users?
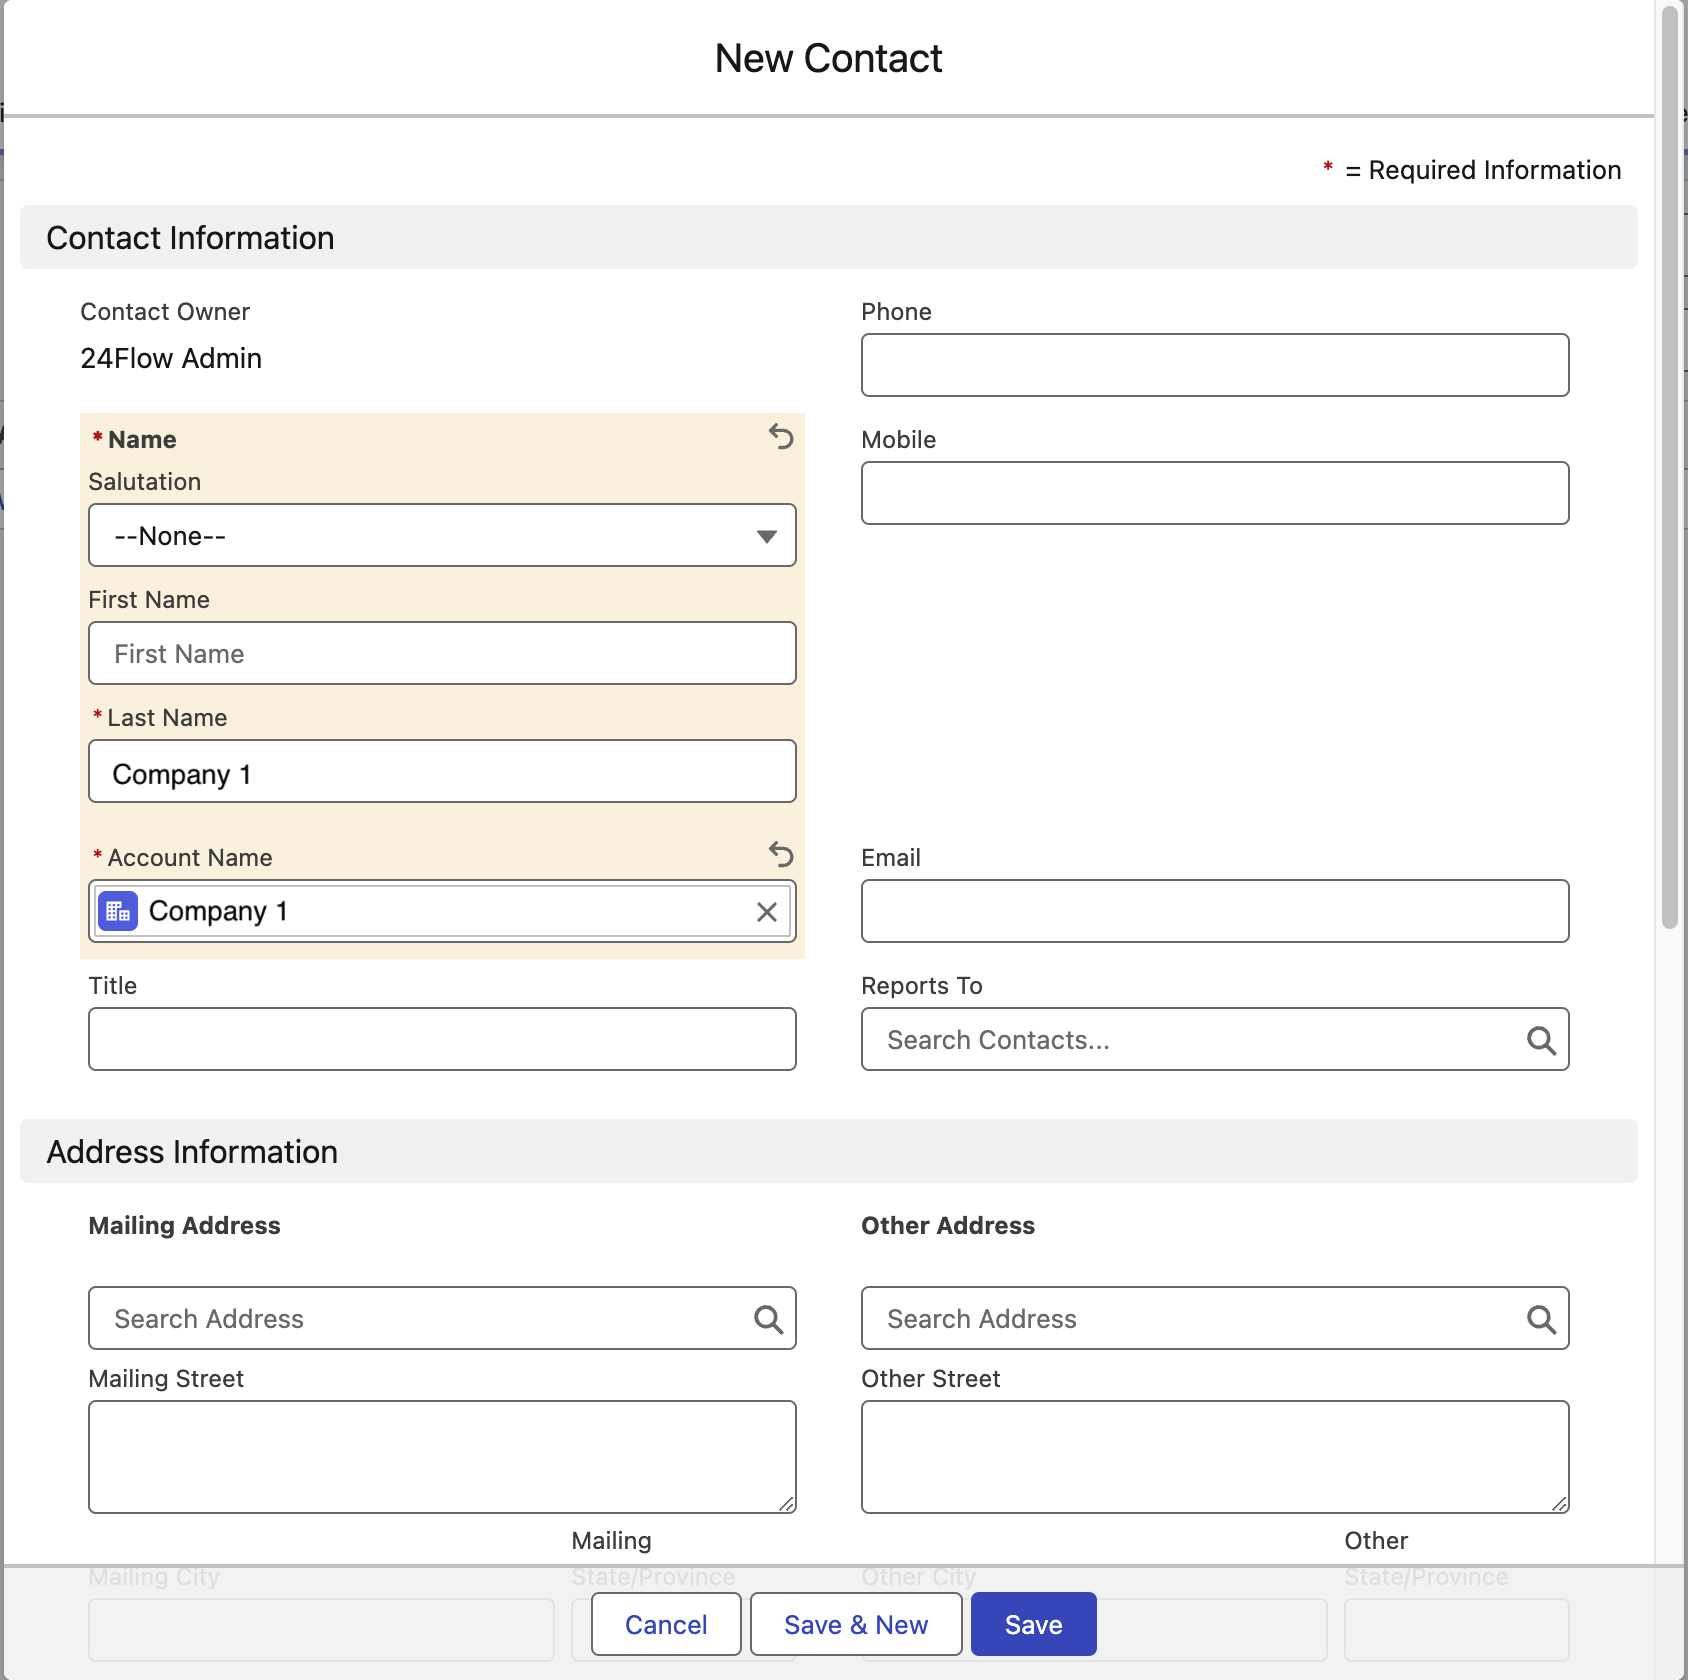
Step 1: Go to contacts and create a contact with the account filled in on account name. If it is a company wide account, you can fill in the company name on the last name field. Other fields are not necessary to make the customer portal work.
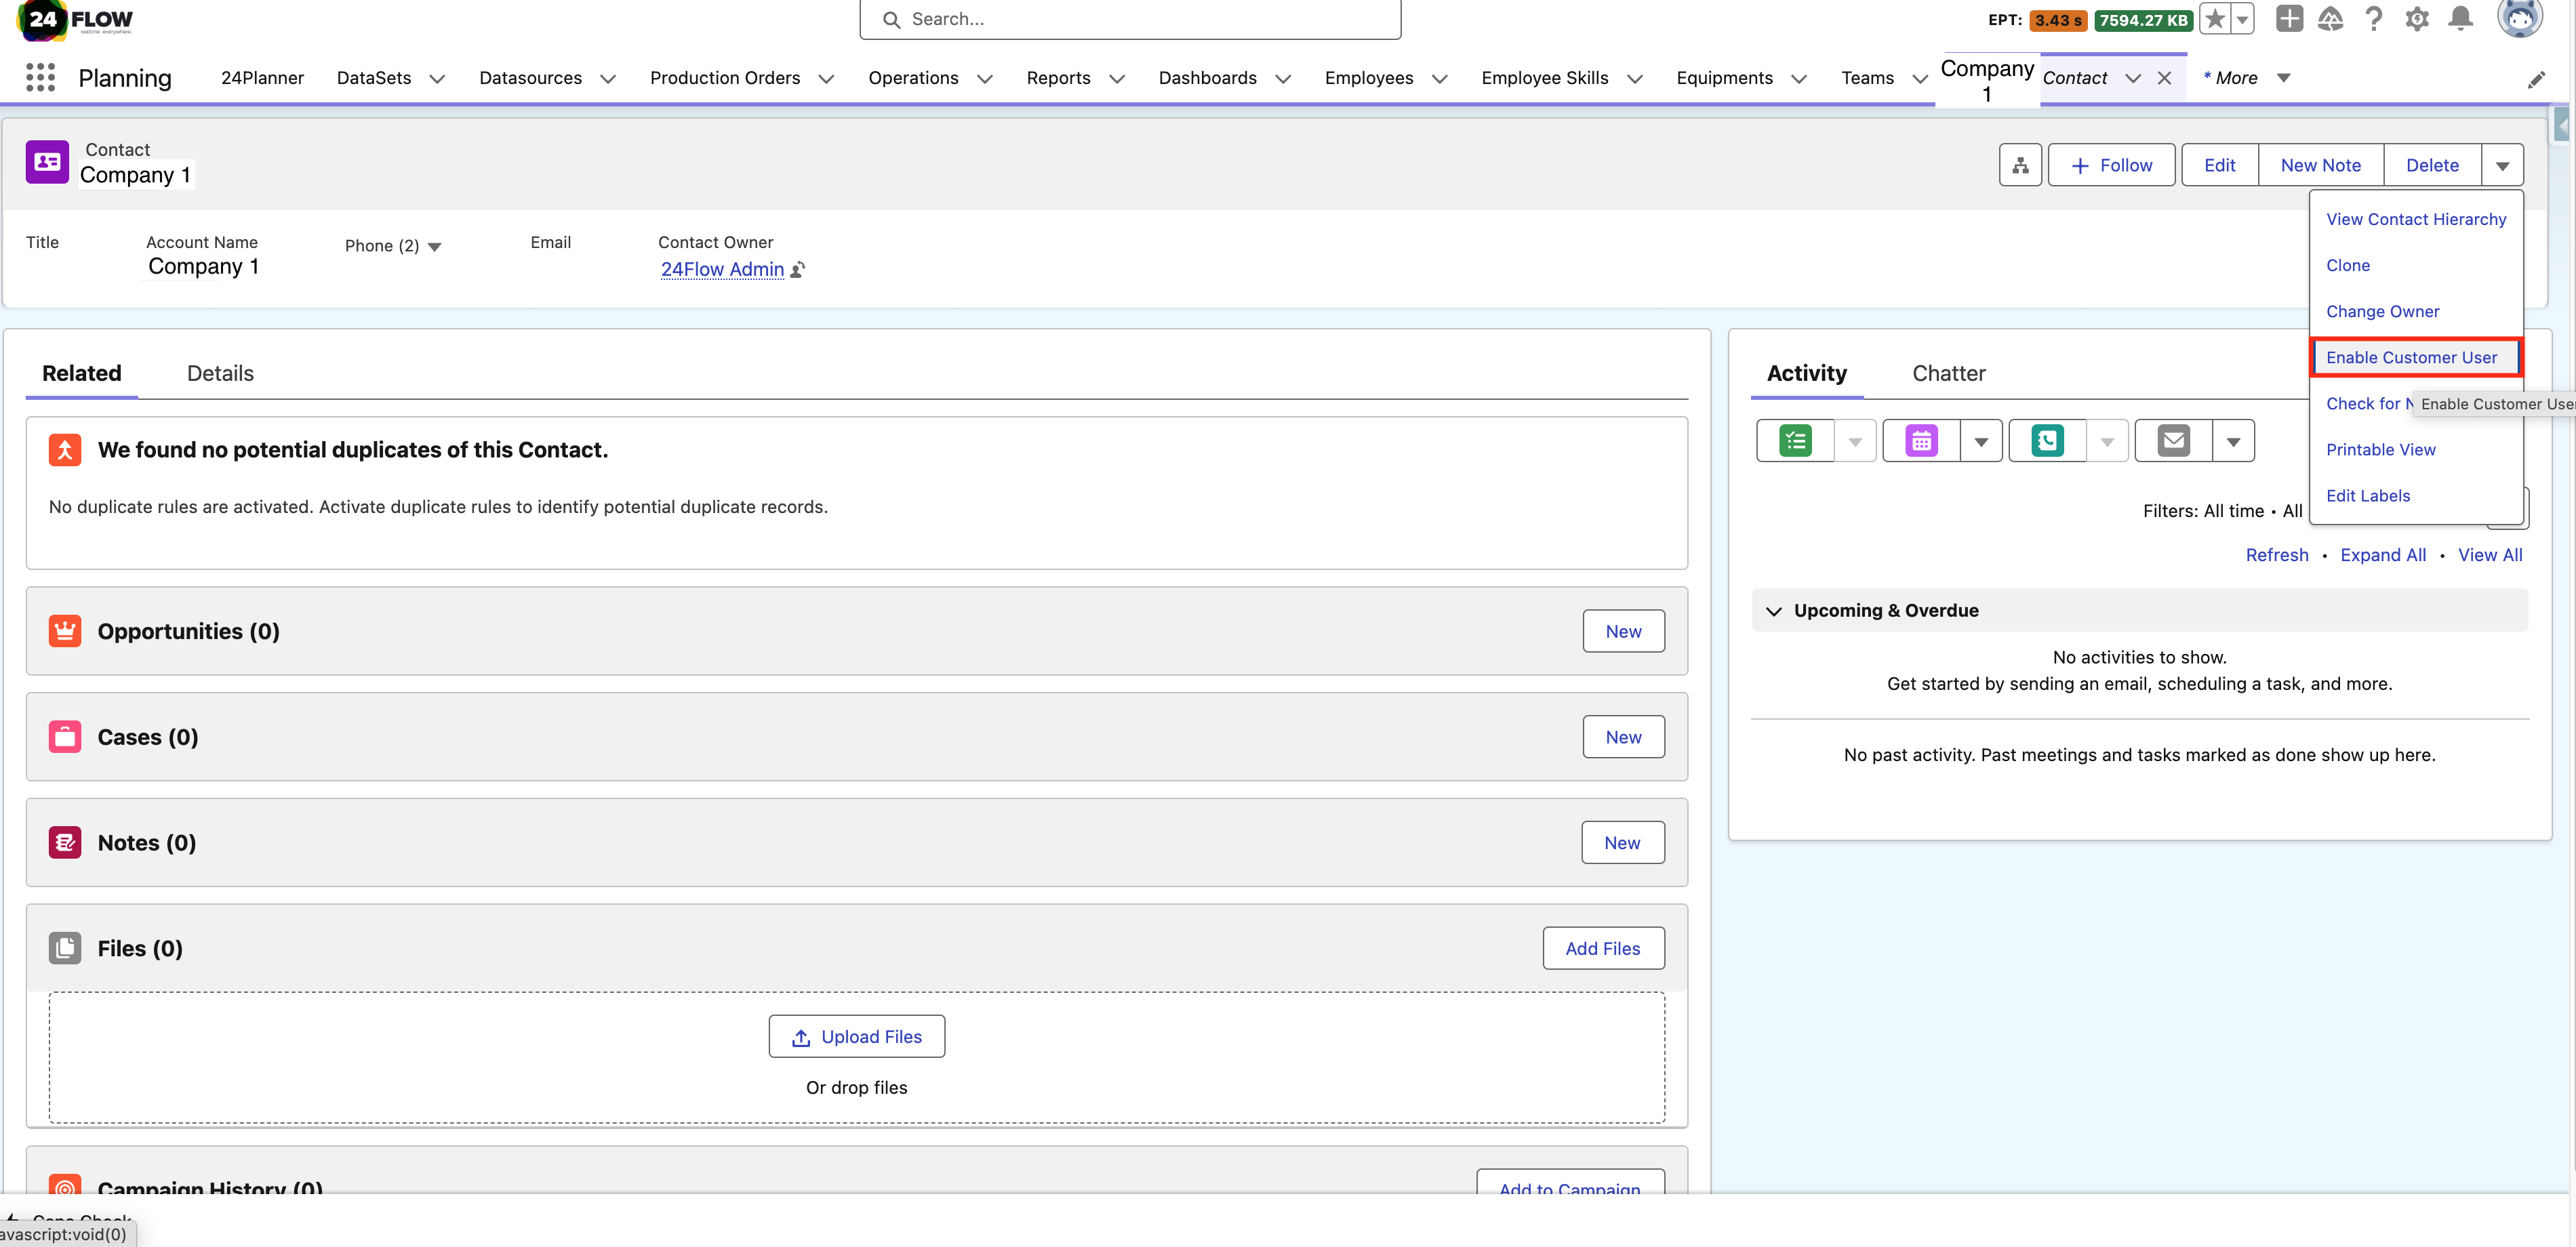
Step 2: On the contact record, press ‘Enable Customer User’. this will redirect you to the create user screen.
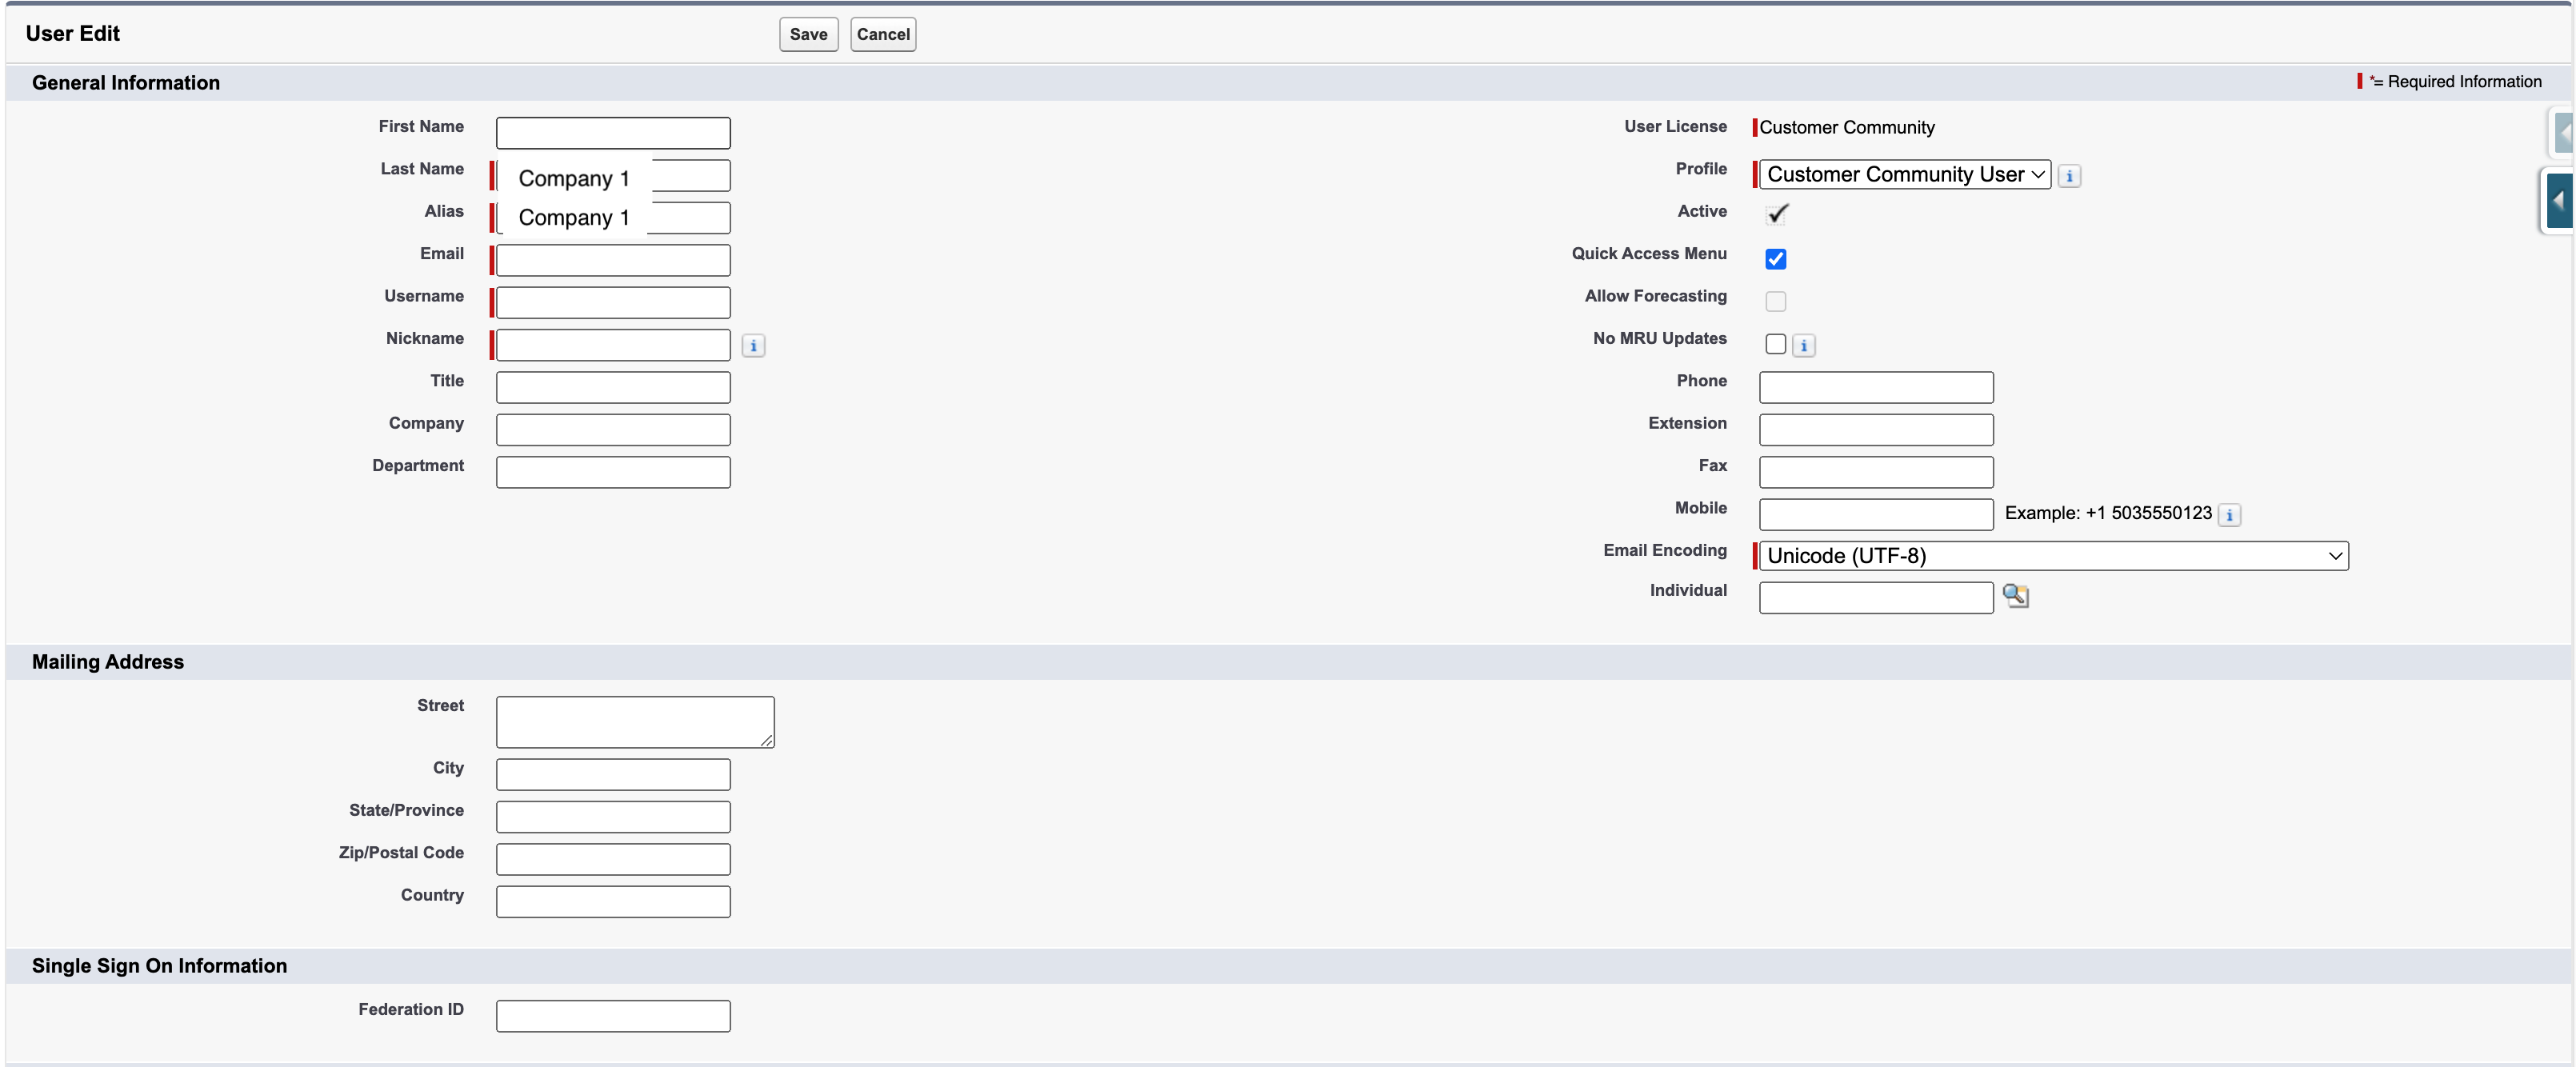
Step 3: Create a new user. All necessary fields are required. Press Save.
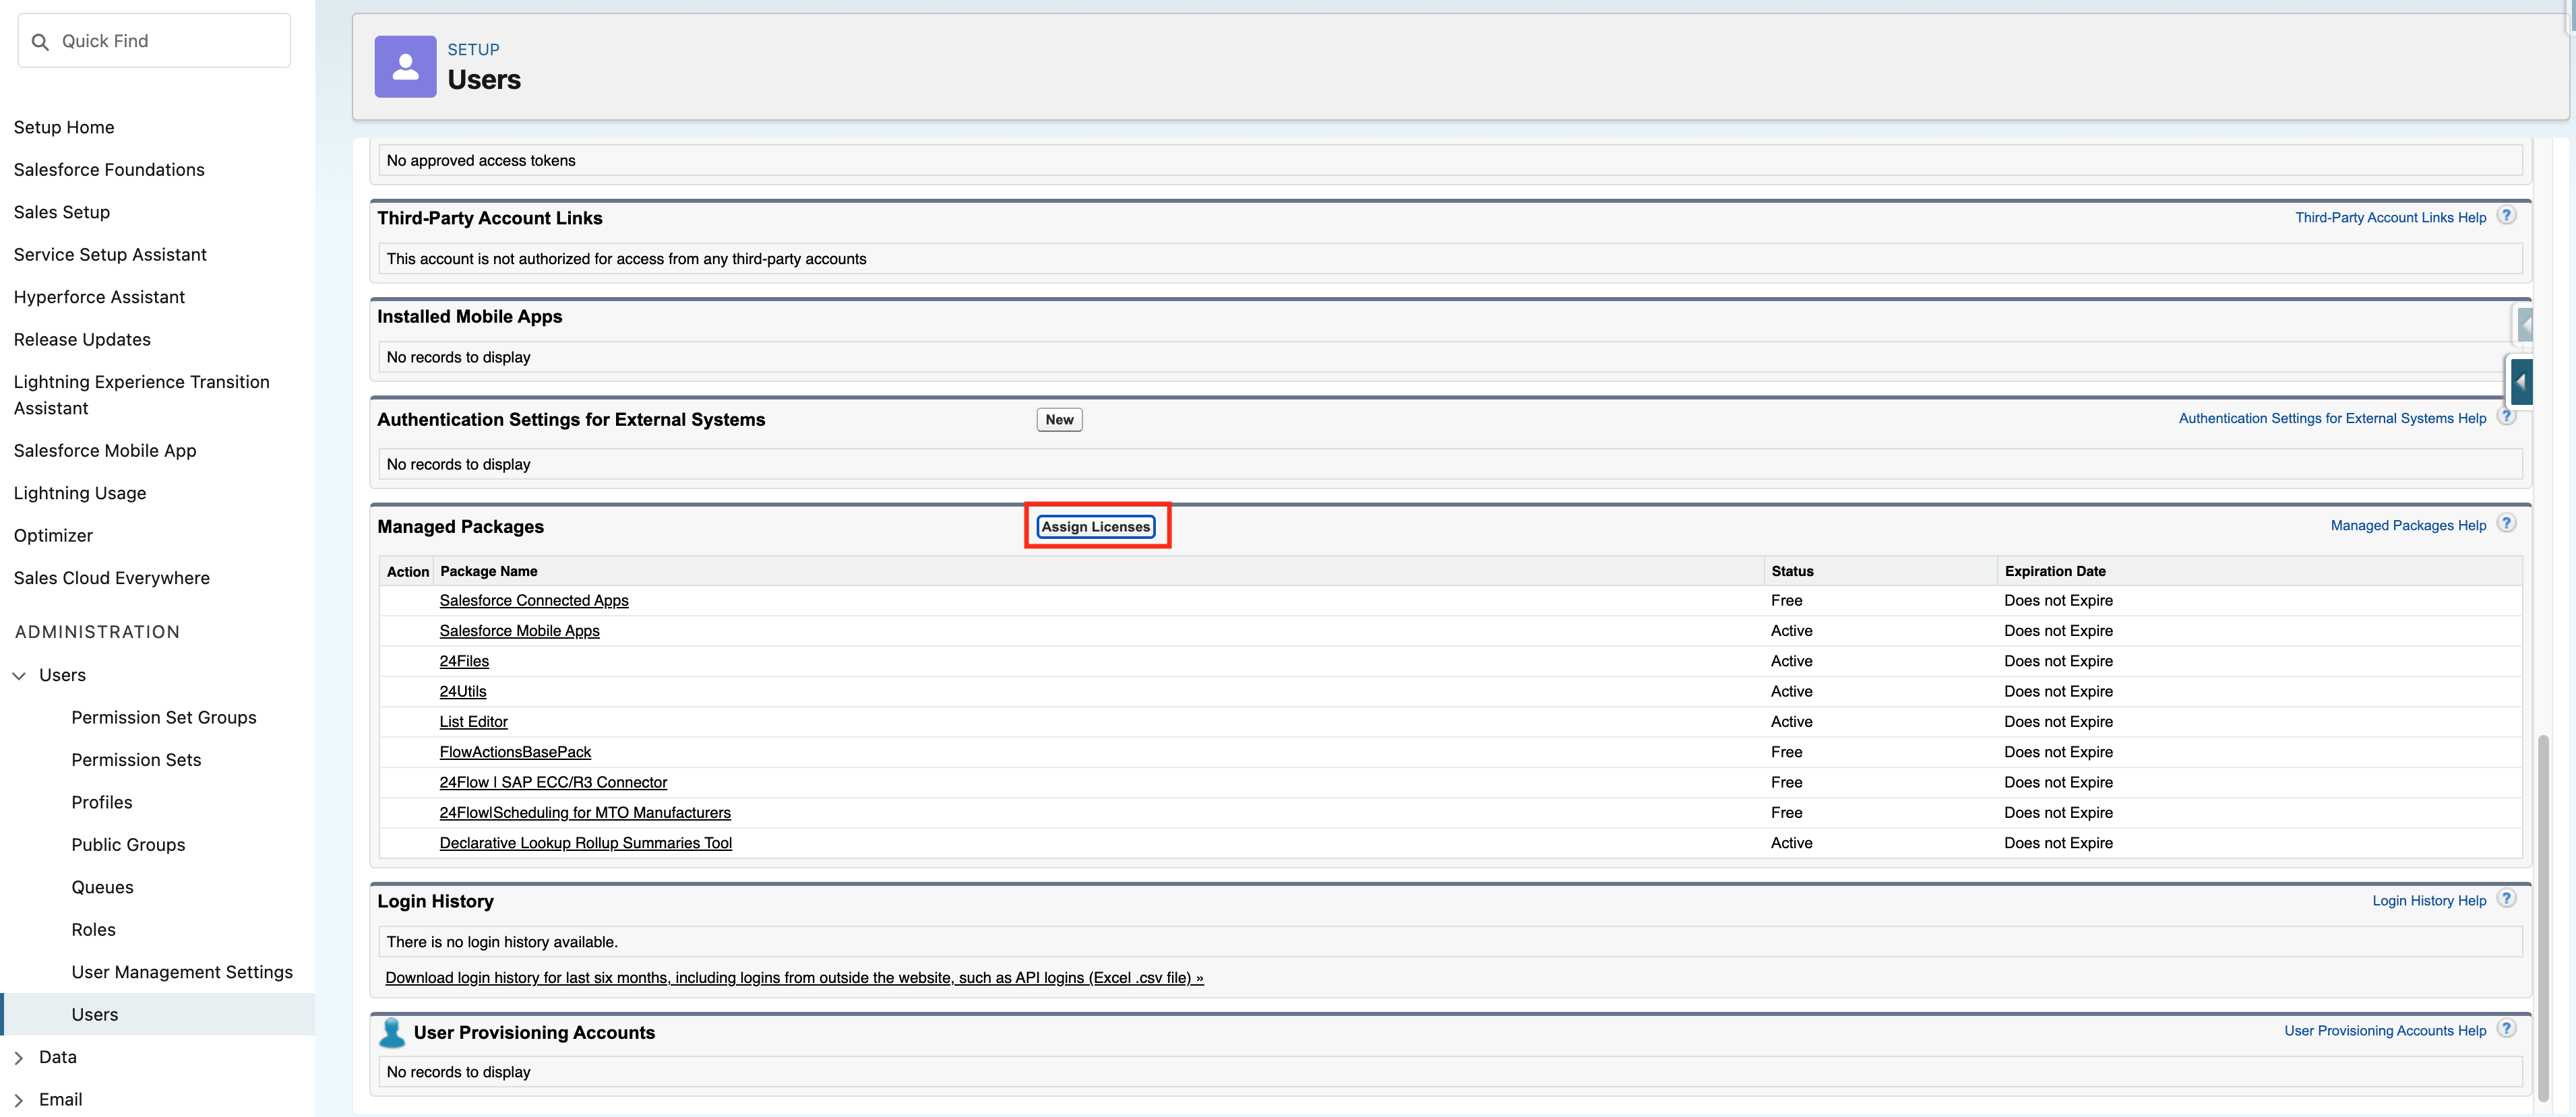
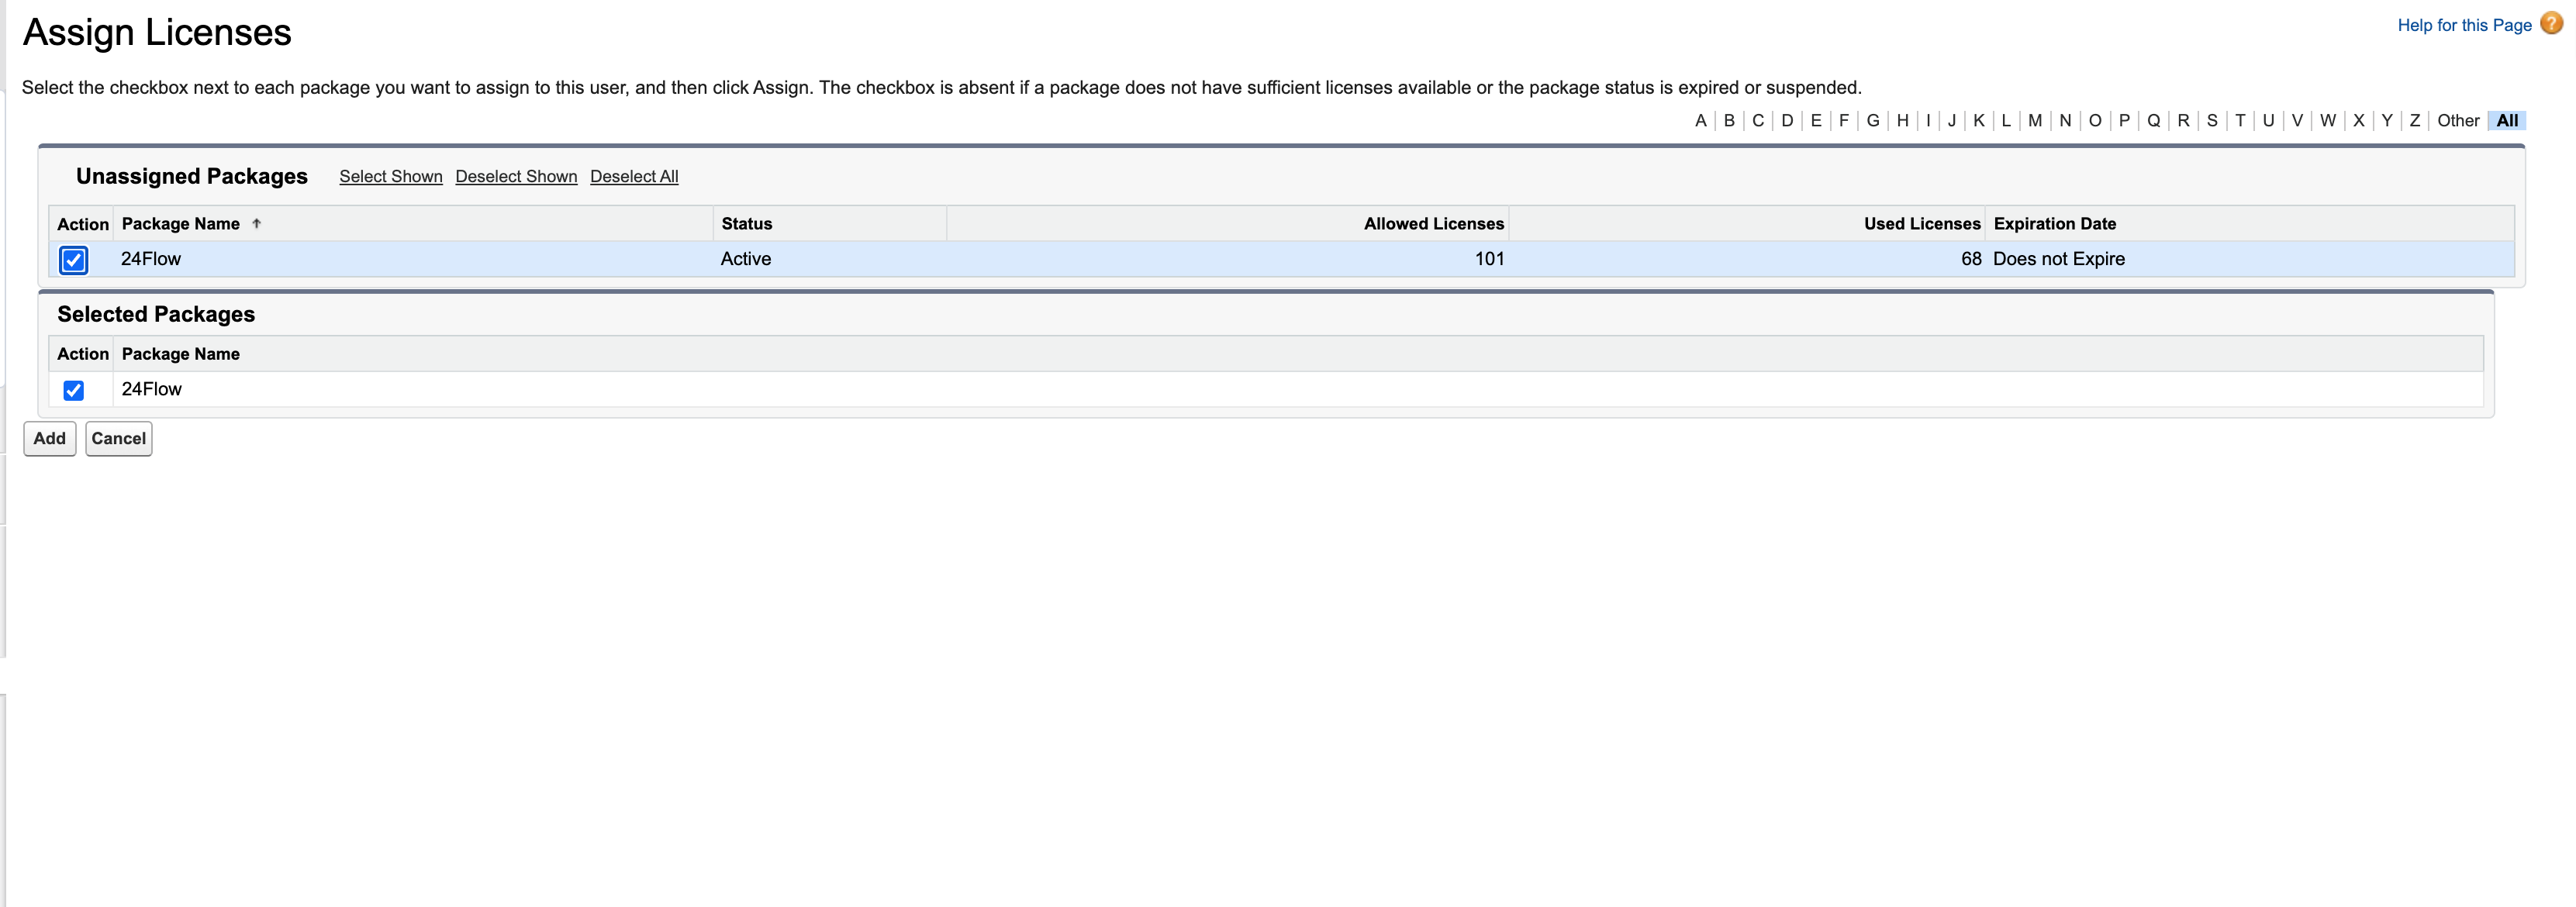
Step 4: Assign the 24Flow license: Go to the user record > Managed Packages > Assign Licenses > click 24Flow > Press Add
Step 5: Assign the necessary permissions to the portal user for access to Salesforce records.

All set! Now the customer should have received a welcome mail to set a password. Afterwards they can log in and see their outstanding orders.
Note: It is always possible to preview what your customer sees by clicking ‘Log in to Experience as User’ on the contact
