Multilingual
It is possible to customize the UI of 24Flow in a particular language, for a particular user.
In order to configure 24Flow in a particular language, the Translation Workbench functionality of the Salesforce Platform is leveraged.
For all 24Flow managed objects and fields, 24Flow offers a Dutch translation.
You can activate this translation via the steps described below.
Before uploading the Dutch translation package, please review the official Salesforce documentation: Translation Workbench in order to:
Set up your org properly.
Learn how to import translation files.
Learn how to translate custom objects and fields.
Download the translation file
Before importing translation files to your 24Flow environment, you will need to download the translation file. The latest translation file can be downloaded via: https://drive.google.com/drive/folders/17BB94IuWDYBvbHcXX2uDzCZSI05lZfxc?usp=sharing. Be aware that it is that new translation strings may be added with every new 24Flow release.
Always take the last modified translation file.
User Settings: Change language
Set the desired language per user.
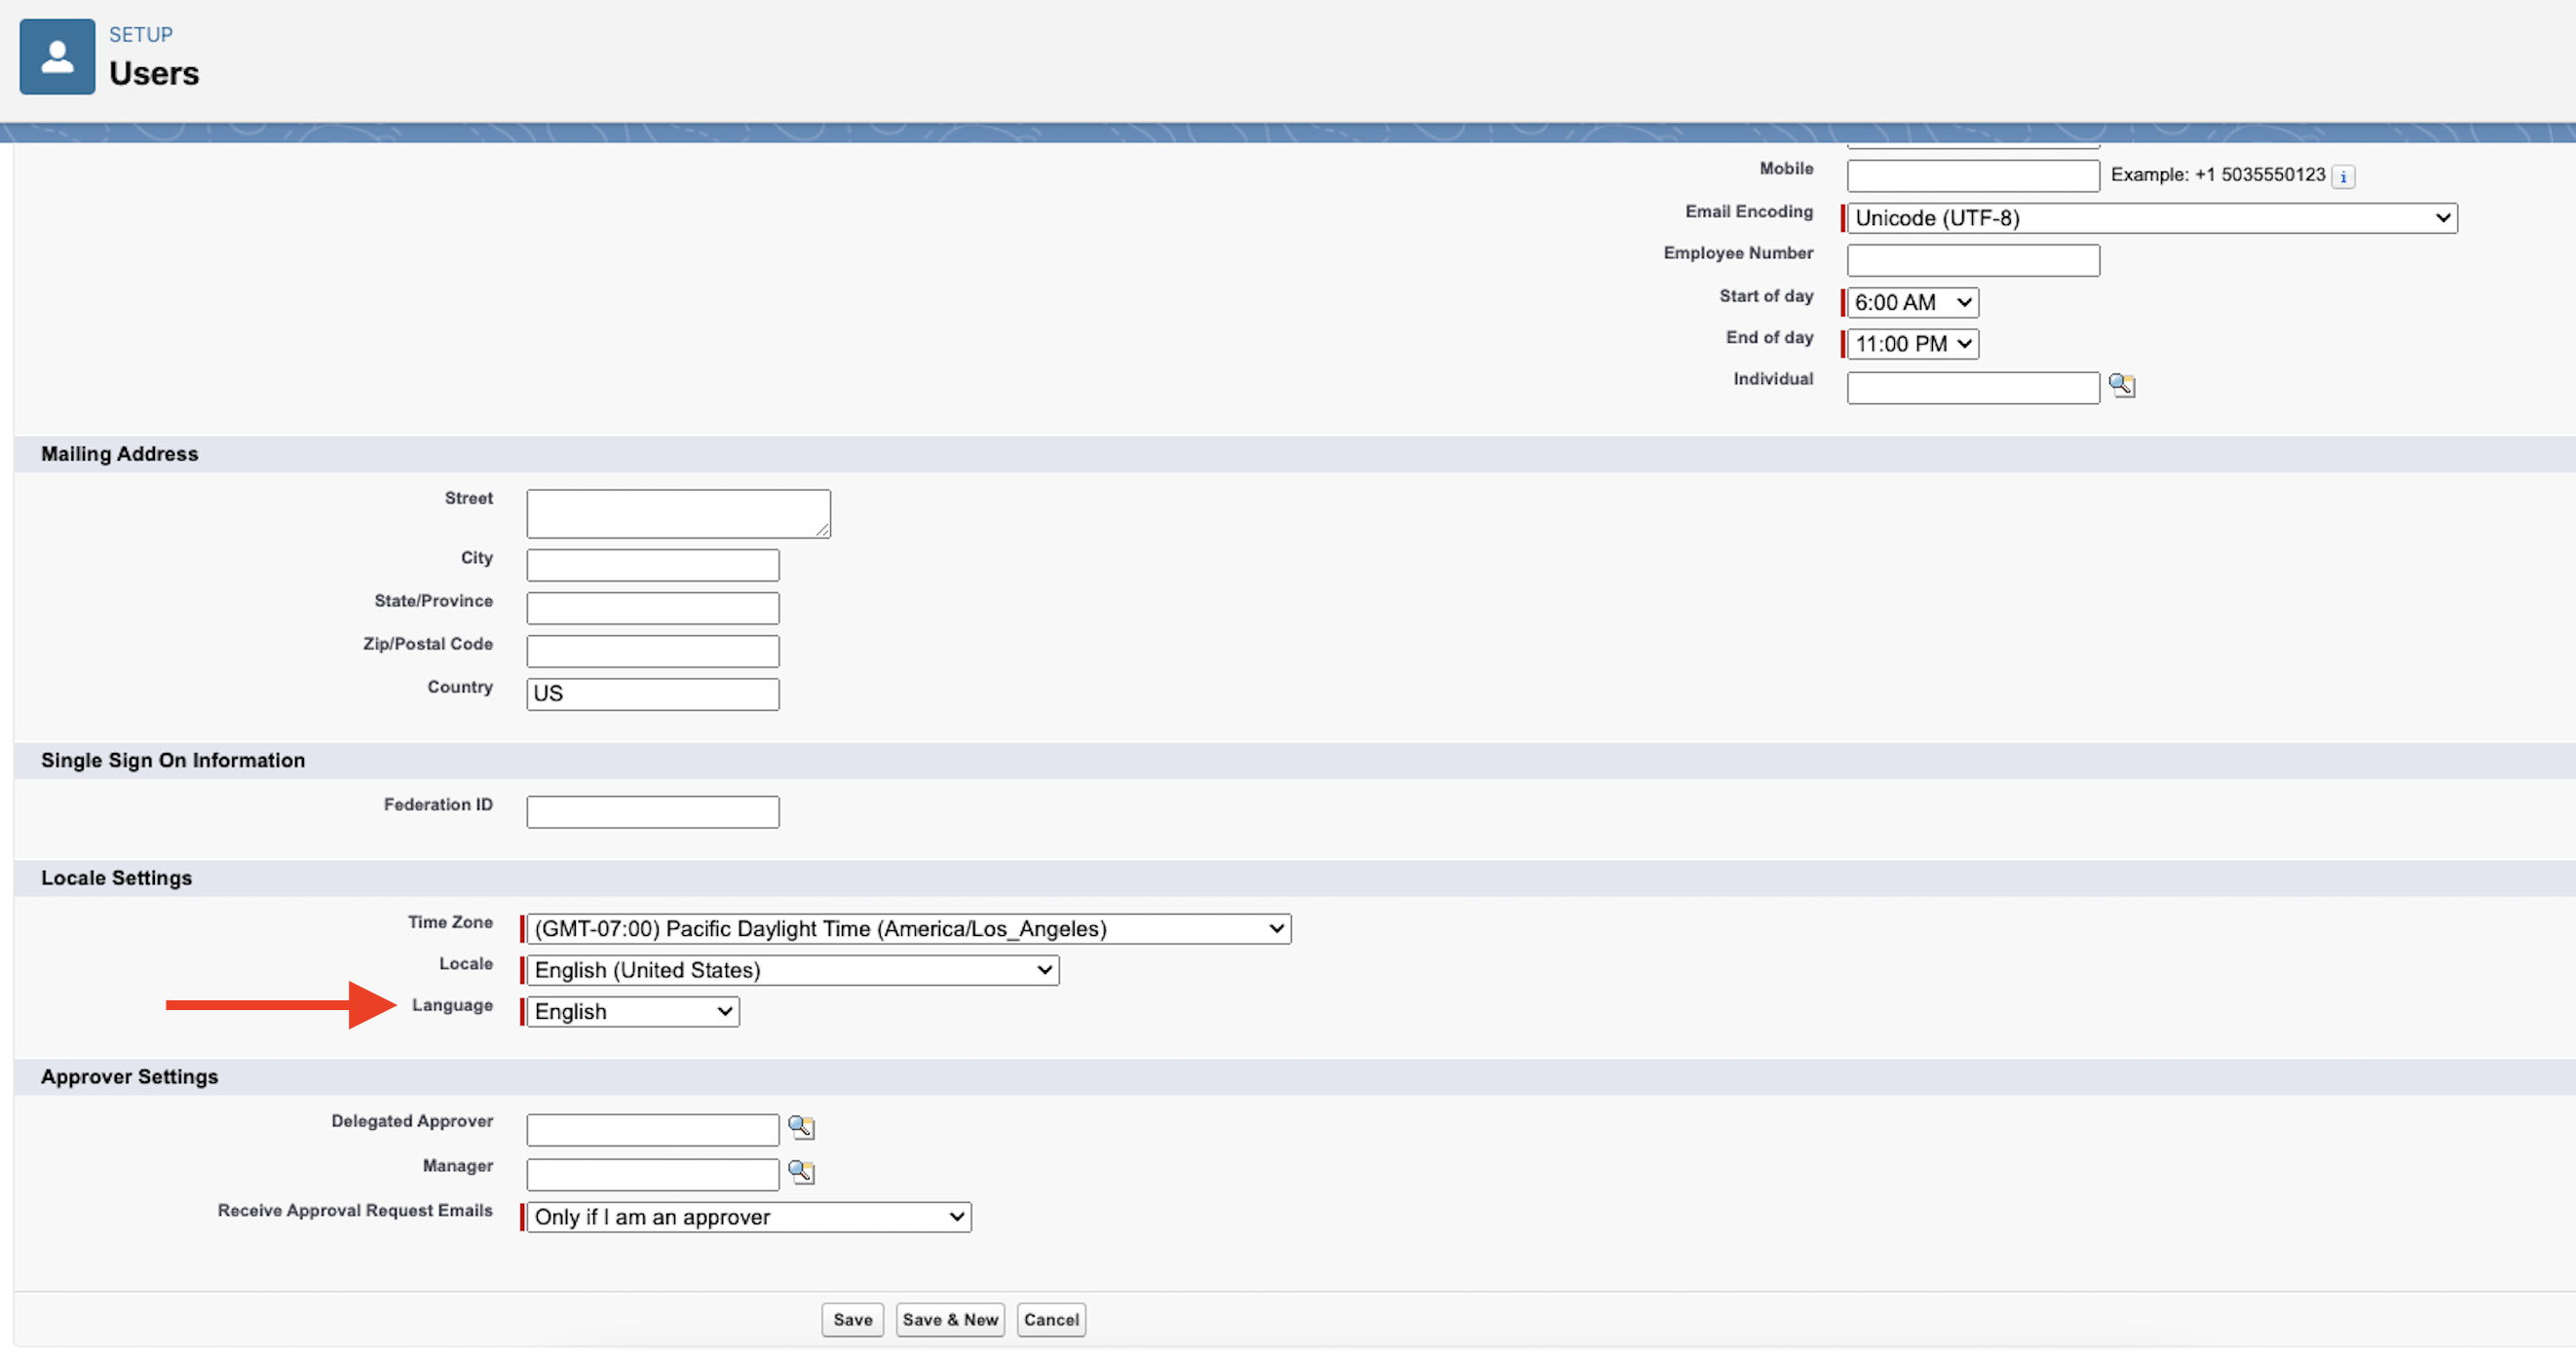
Select the desired language per user.
Translation of the Team Cockpit
The Team Cockpit is the main interface for operators and it will likely be the first interface that you want to translate. Here are some tips and tricks on how to translate the Team Cockpit:
In Process, In Buffer, Expected: The labels for these section headers are set in the Team Cockpit Settings app, section Team Cockpit Statuses.
Translating column headers: Navigate to Setup > Translation Workbench > Translate. Select the applicable object and add the translation.
Labels for buttons, eg. Claim and Release: Navigate to Setup > User Interface > Custom Labels. Search for teamCockpit_claim and teamCockpit_release,; open (click on the label, do not edit) and add your translation.
Action column header in Team Cockpit: Navigate to Setup > User Interface > Custom Labels. Search for teamCockpit_actions and add your translation.
Rename Tabs and Labels: Navigate here via Setup if you want to change the name of objects, tabs and the name field.
The Salesforce platform uses caching so any changes that you make may take some time to become visible in the user interface.
Translation of Related List Labels - Step by step example
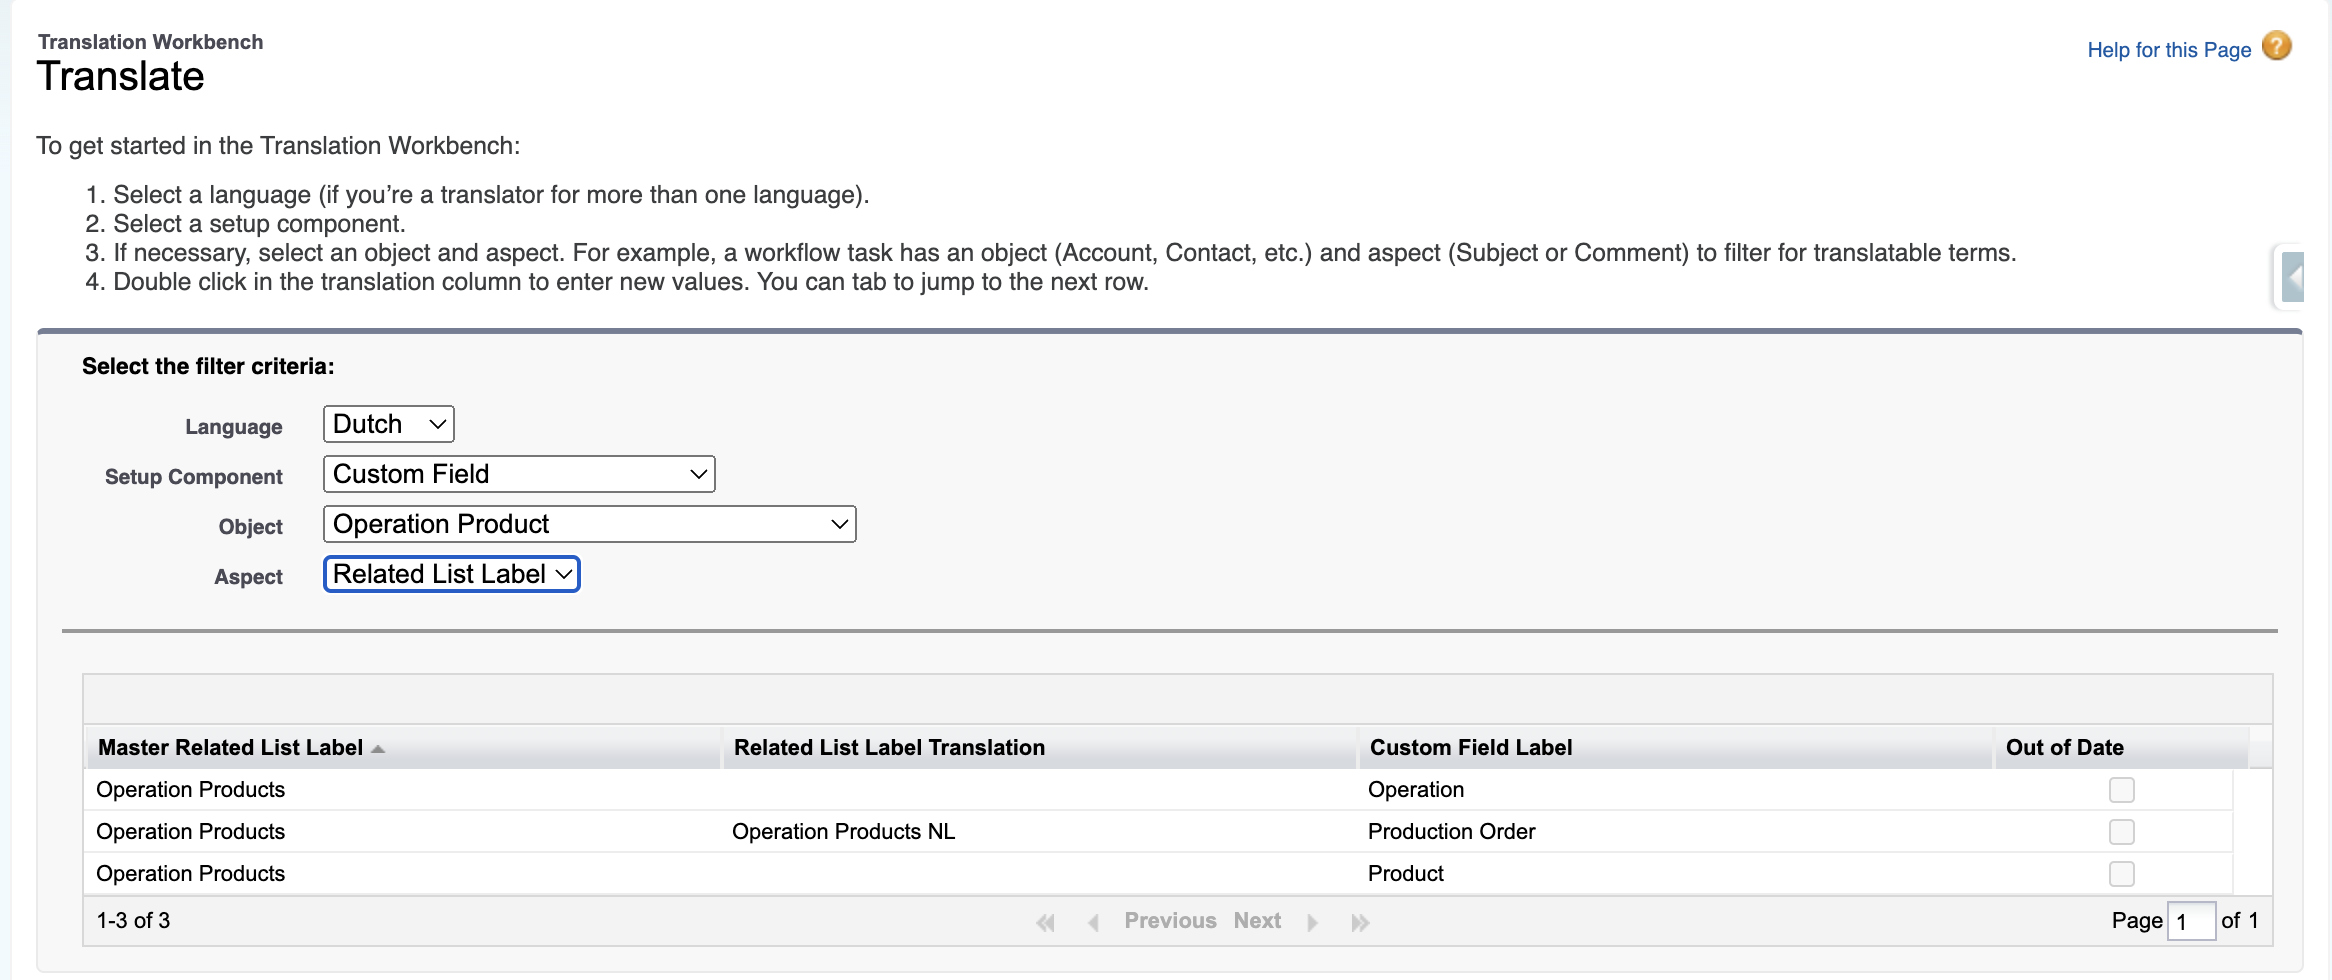
Select Your Language:
In the Setup area, go to the search bar on the left side called Quick Find. Type "Translate" and click on the "Translate" option that appears.
In the Translation Settings, select the language you want to translate into—in this example, choose Dutch.
Select the Component:
Under the Setup Component dropdown, select "Custom Field" because related list labels are often derived from custom fields on the object.
Choose the Object:
Next, select the object that your related list label belongs to. In your example, this would be "Operation Products." This object is where the related list with the label appears.
Select the Aspect of the Label: Under the Aspect dropdown, choose "Related List Label." This is important because it specifically targets the text displayed on related lists, rather than other text like field labels or help text.
Find and Update the Label:
After selecting the aspect, you will see a list showing where the related list label is used within Salesforce.
Find the specific place where the related list label (like Operation Products) is visible. Click on it, and you’ll have the option to type in the new label text in Dutch or any other language you selected earlier.
Enter the new translated label and save your changes.
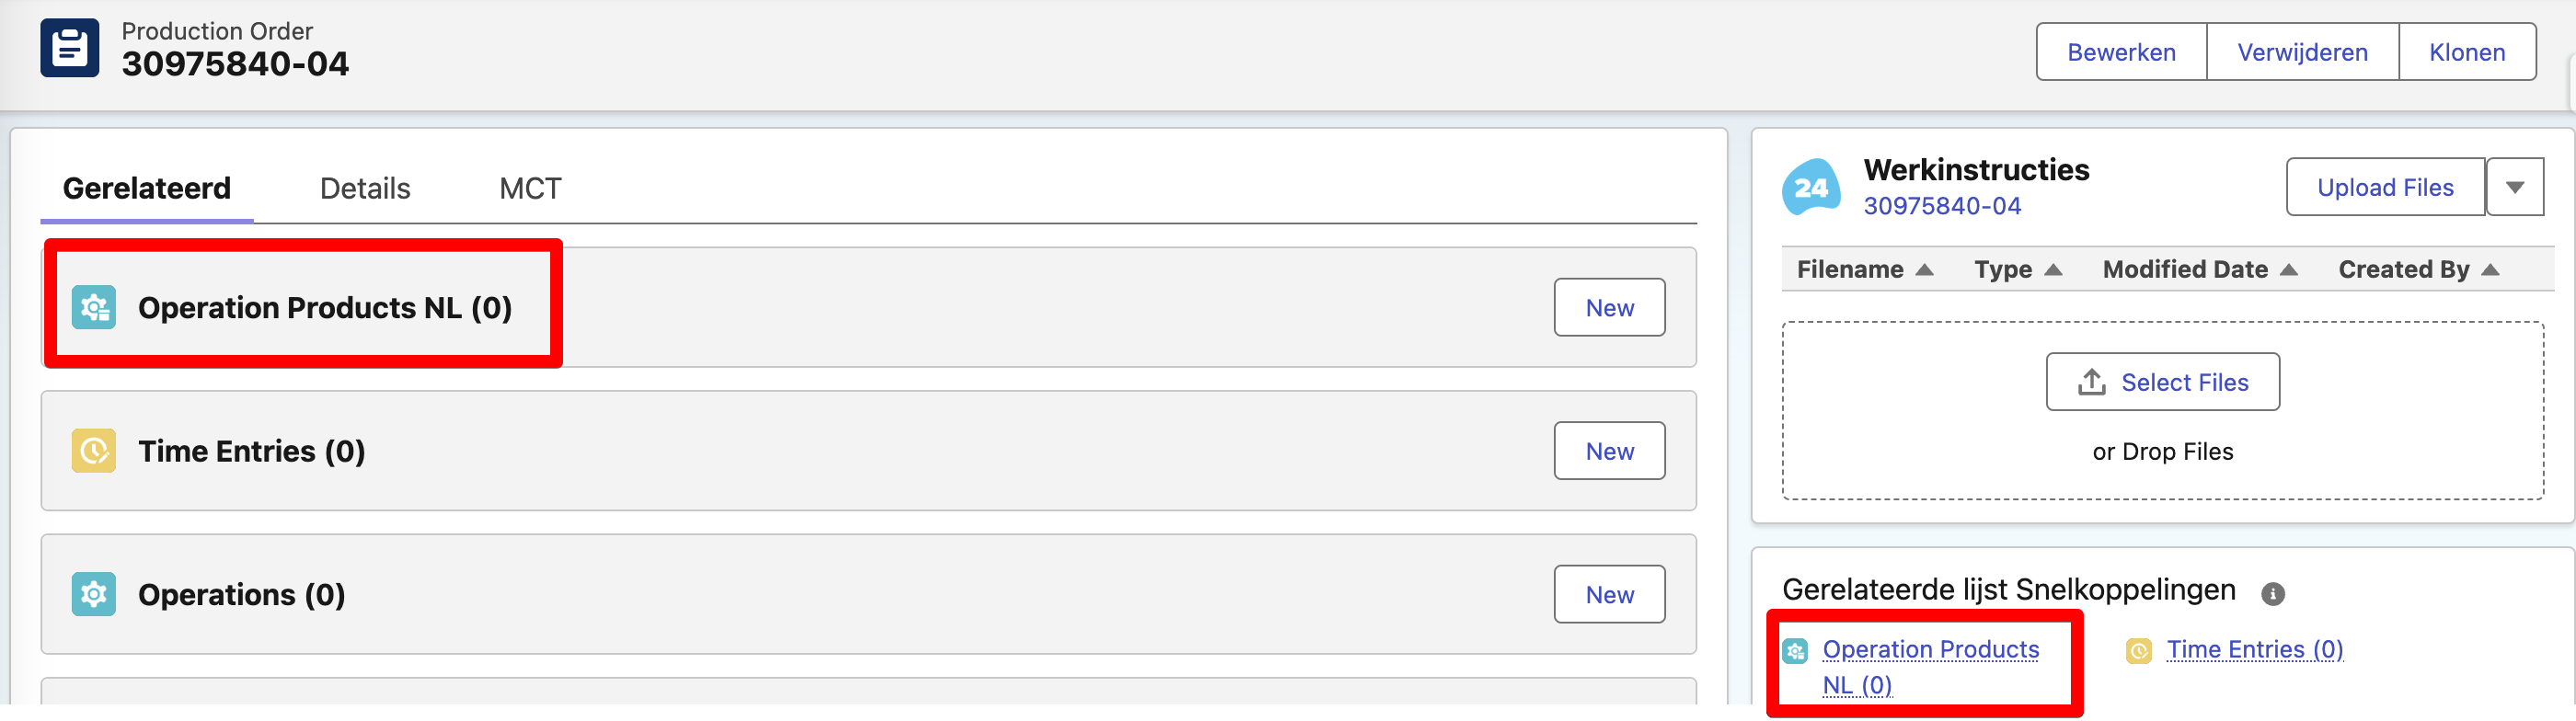
Expected output :
Note : only visible If the user his language is set to Dutch (see above)
Expected outcome